
- Home
- Protocols

-

Immunofluorescence microscopy and analysis
Last updated date: Jul 10, 2022 Views: 652 Forks: 0
Protocol: SDH analyse
Materials; https://imagej.net/Fiji
SDH pictures
1. Start Fiji
2. Open a picture
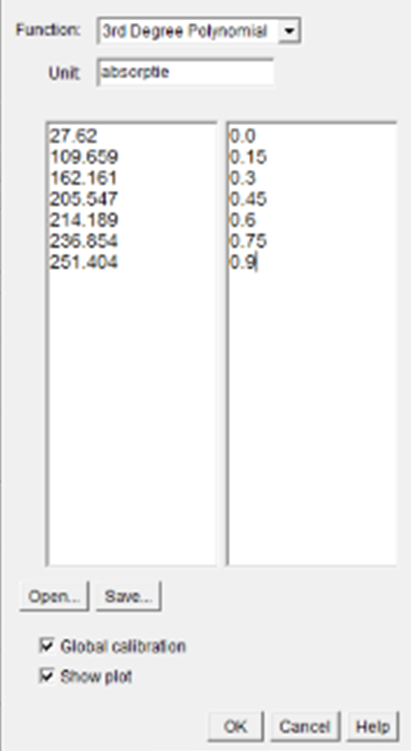
3. Analyze > calibrate >
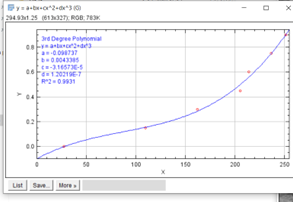
a. Function: 3RD Degree Polynomial
b. Unit: absorptive
c. Open > standards
d. √ Global calibration
e. √ Show plot
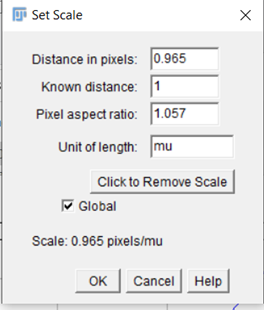
4. Analyze > set scale
a. 10x magnification = 0.965 pixels/micrometer
b. Pixel aspect ratio: 1.057
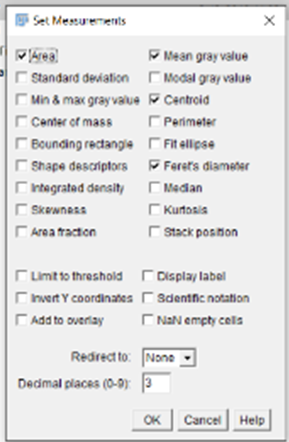
5. Analyse > set measurements
a. Area/mean gray value/centroid/feret’s diameter
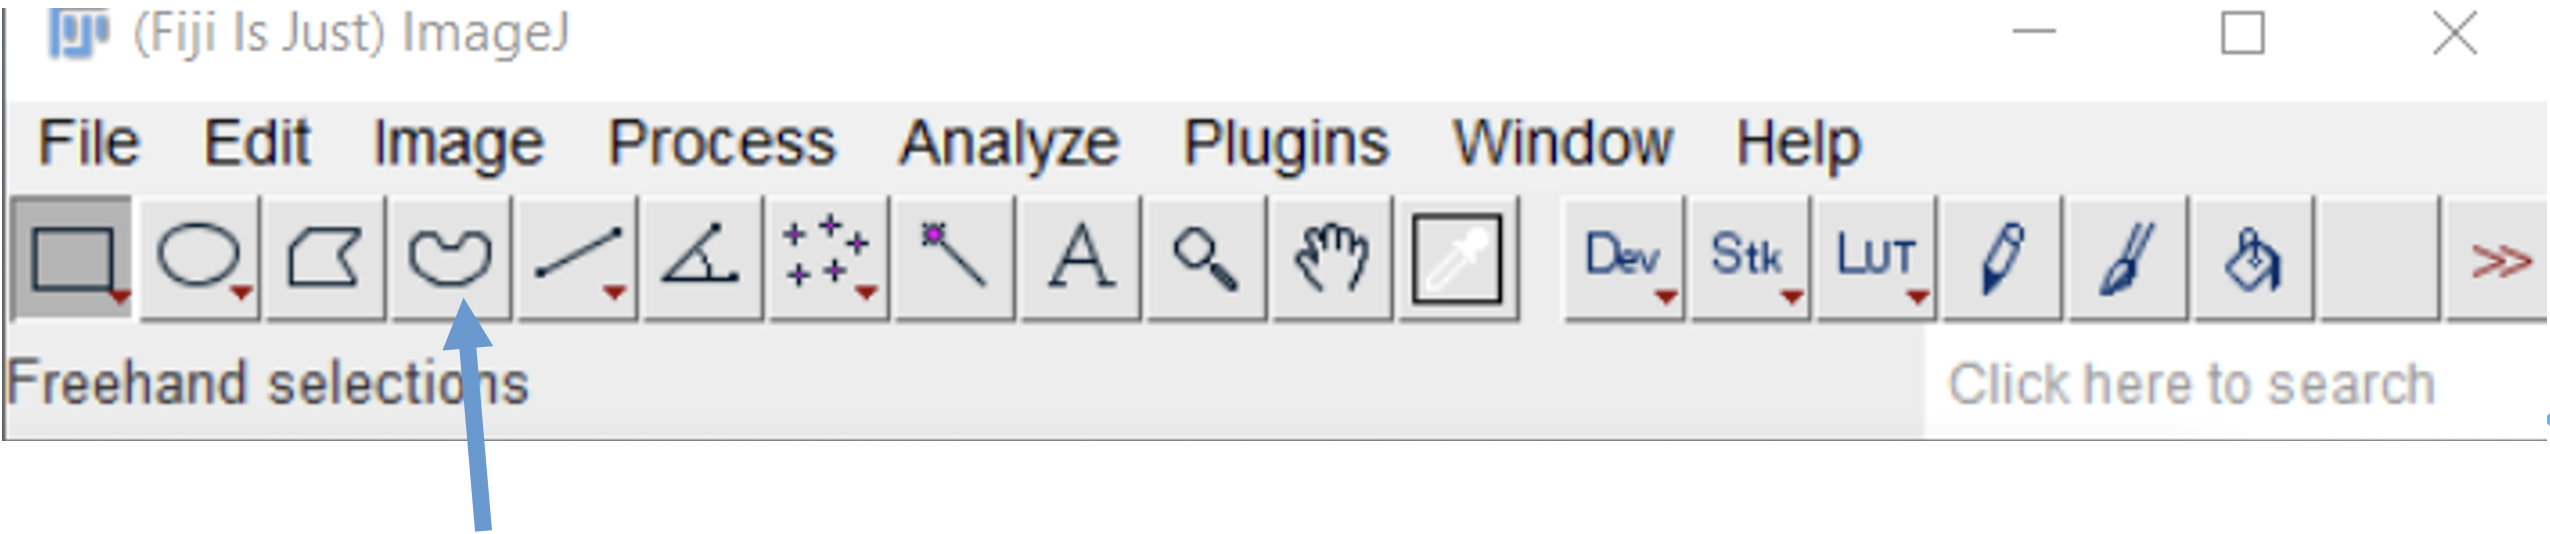
6. Use freehand section
7. Zoom in your picture as much as you like with the + key
8. Circle one cell
9. Press m button for measurement
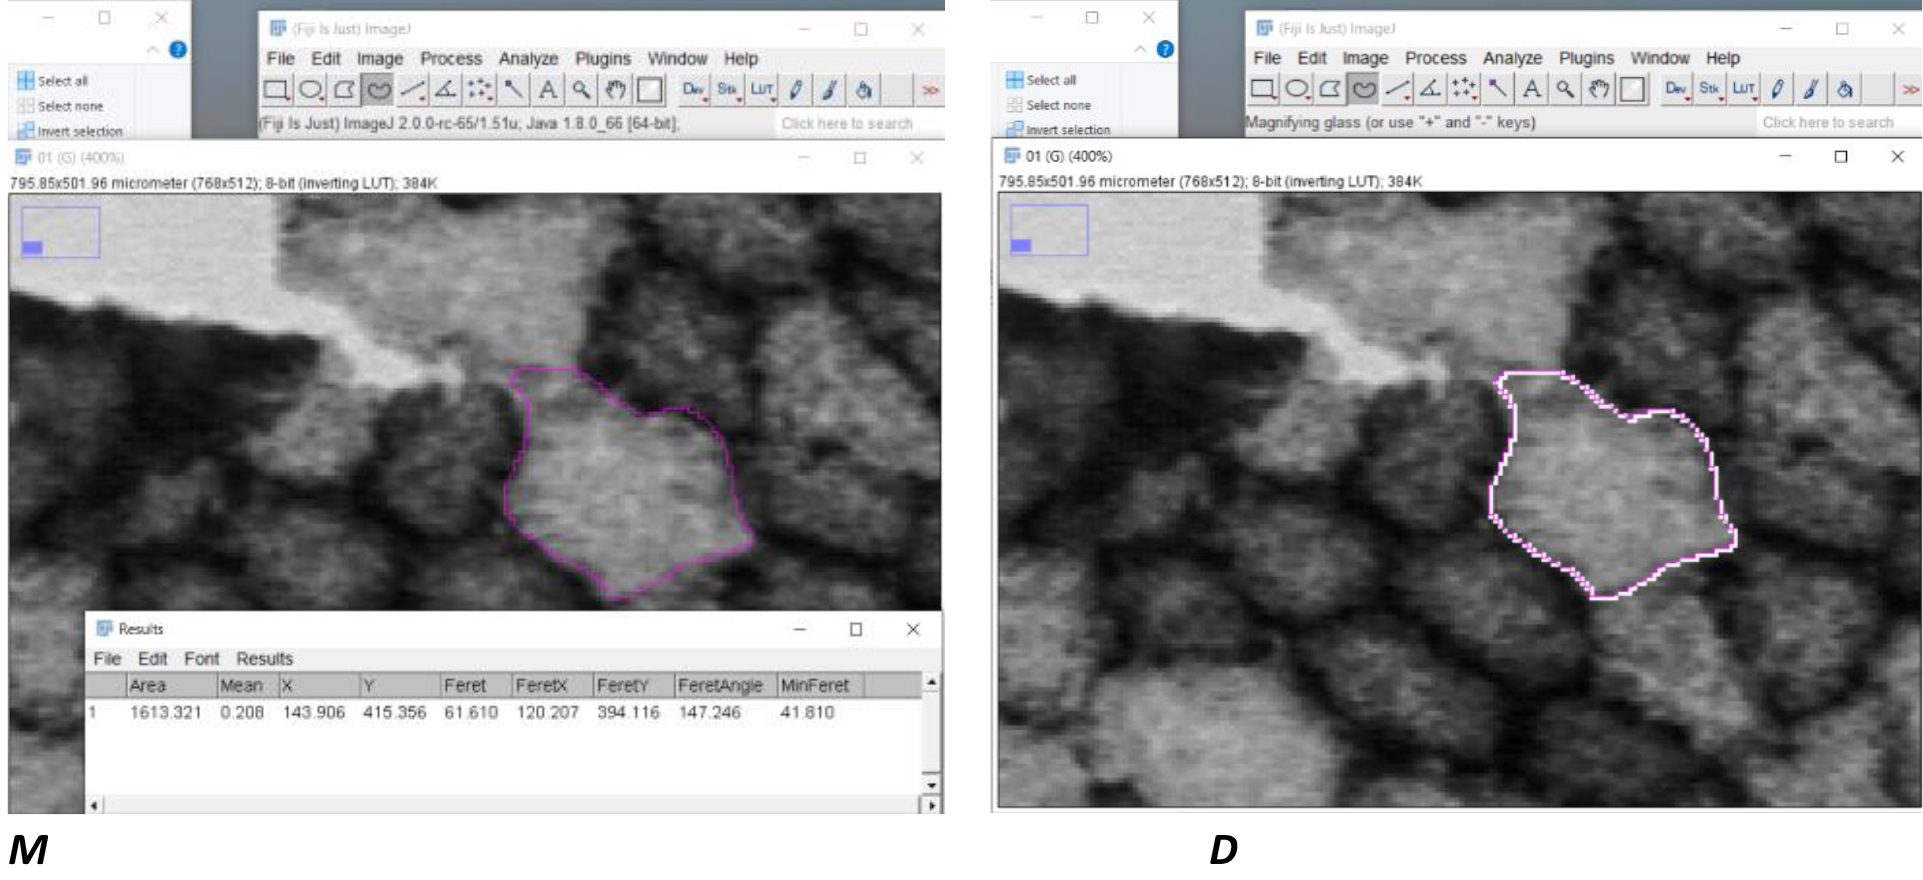
10. Press D for draw
11. Next cel circle > m > d
12. Repeat step 11 Again and again and again………………………………………………………………………….
Images were captured with [×10] objective using a CCD camera (Sony XC77CE, Towada, Japan) connected to a LG-3 frame grabber (Scion, Frederick, MD) and a DMRB microscope with calibrated gray filters (Leica, Wetzlar, Germany). Spatially averaged SDH activity, including subsarcolemmal mitochondria, was obtained from 660-nm absorbance measurements in randomly selected cells using ImageJ (NIH) and expressed as ΔA660 per µm tissue thickness per second of staining time (ΔA660·µm-1·s-1).
Measurement protocol NIH image for SDH
Note: SDH with red filter (660nm)
Getting started with the equipment
- Switch on: the Camera adaptor (above oscilloscope), the monitor (sony), the lightsource (at the left)
And the computer - As soon as the computer is running, the NIH Image can be opened.
- Make an own directory on your desktop. Here you can collect all documents and images.
- The Intefrerention Filter can be placed in the microscope by removing the filterholder,
And placing the filter in the holder, and placing the holder back in its original position.
Be sure that the filter stays cleen (no fingerprints). The greyfilter on the leftunder side must be off. - At the level of the occulairs there are two slides on the left side, witch can be pressed in, or pulled out.
The lower one devides the light between the oculairs and the camera. The upper slide devides the light between the ccd camera and the photo camera. Both halfway. Normalwise these slides can be placed Somewhat in between. The light on the desk should be on, and the TL light should be off. (crucial) Be sure that the Ring underneath the slidestage is placed in the H position.
Setting the Microscope (Koehlerse light setting) Calibration.
- Switch on the live camera in NIH image by /special/start capuring
 +g (hold apple icon en type g)
 - Place the glass slide on the microscope stage, and set the enlargement with wich you want to measure. (SDH 20x (green occulair) )
- Search for a part of the tissue, and focus the occulairs. Don’t focus any more until the system is set.
- Set the lightsource in such a way, that the speciment is visible.
- Shut the field diafragma (on the left under side, behind the lightsource F) and set the field-diafragma sharp, by turning on the condensor rotary knob, while looking throught the occulairs. If nessecary, you can align the diafragma by the rotary knobs on the left and right side of the condensor.
- Open the fielddiafragma until the light is seen throught the whole part of the oculairs.
Dont’t move the condensor knob any more. - Open the aperture diafragma(above the field diafragma, A) completely, and close it in such a way, that the light is slitely dimmed. For the 20x objective the knob will read 2,5.
- Look now for a empty space on your slide. This is not so easy, but very inportant. There should be no particles visible on the slide. You can check this by moving the slide table. (note: there are particles in the collum where the light enters. . These wil not move with the table. These will be not a problem.
- In the empty spot on the slide you now can optimize your amont of light. Check this with your live image in NIH Image. When the light is optimized, there won’t be any yellow points visible.( insufficient light), and a slight amount of red dots( to much light). Note: there will not be any filters in the lightpathway. (greyfilters are all off, and the calibration filters at the right back side will all be out). If you can’t see any red or Yellow points,even with maxima land minimal amount of light, choose 1 or 2 times g (until it indicates, that it is on Live. Note: Don’t touch the knob of the lightsource any more. Click on: Options>preferences>highlight satured pixels . special>save blank field>file>save as on the left-top it can be clicked away.
- Make a background picture: /special/save blank field. Behind the camera image appears an almost black image, leave this like this as long as you are measuring., and save it when this is disirable. With this you can correct for unsavory distribution of light, and for small dust particles in the lightway. This can be of high influece with low absorption values. ( SDH human biopts, measuring background to correct image)
- For the calibration, set all filter combinations, also without filters. See also the list next to the microscope. Choose g, for a live image,/analyze/measure or 1 to measure, and set then the next combinations. Remove all greyfilters. See also greyfilters.
- Go to / analyze/calibrate and fill in the absorpion values in the tabel. (as notided on the side of the microscope), choose a 3de degree polynome, and choose OK. The plot wich will be visible on screen can be printed at: /file/print. Choose again /analyze/calibrate, followed by save, when you want to save these values. This will be inportant if you wont to measure later on your PC. Unit of measure>absorption>OK
- Now go to special/analysee/set scale to measure the distances. Select first micrometers, then fill in the aspect ratio and the number of pixels per micrometer. Select OK. See also set scale.
- The system is now calibrated, until you shut down NIH image, or microscope or camera.
Recording of images
- Open the live image when nessecery with g or /special/start capturing.
- Look fort he desireble images, with the rotary knobs on the slide stage, focus with the focus knob, and check this on the computer monitor. Don’t do this with the microscope, or video monitor.
- Select g to save the image or /file/save te record for later measurements.
Set scale:
| Objective | Pixels/ Micrometer |
| 5X | 0.4825 |
| 10X | 0.965 |
| 20X | 1.93 |
| 40X | 3.86 |
| 100X | 9.65 |
Pixel aspect ratio: 1.057
Greyfilters
| Filtercombination | Absorbance |
| 0 | 0 |
| 1.4 | 0.15 |
| 2 | 0.3 |
| 1.4+2 | 0.45 |
| 4 | 0.6 |
| 1.4+4 | 0.75 |
| 2+4 | 0.9 |
| 1.4+2+4 | 1.05 |
Special/ video control:
Offset: 44
Gain: 232
- Hillege, M M, Shi, A and Jaspers, R T(2022). Immunofluorescence microscopy and analysis. Bio-protocol Preprint. bio-protocol.org/prep1780.
- Galli, R. A., Hillege, M. M., Hoogaars, W. M., Jaspers, R. T., Bertolino, P., Shi, A. and Wu, G. Lack of Tgfbr1 and Acvr1b synergistically stimulates myofibre hypertrophy and accelerates muscle regeneration. eLife. DOI: 10.7554/eLife.77610
Do you have any questions about this protocol?
Post your question to gather feedback from the community. We will also invite the authors of this article to respond.