- Protocols

- Articles and Issues
- For Authors
- About
- Become a Reviewer

Dissection of Different Areas from Mouse Hippocampus
Published: Vol 3, Iss 21, Nov 5, 2013 DOI: 10.21769/BioProtoc.955 Views: 29295
Reviewed by: Xuecai Ge
Original research article
The authors used this protocol in:
Nov 2012
Advertisement


Protocol Collections
Comprehensive collections of detailed, peer-reviewed protocols focusing on specific topics


Abstract
The hippocampus modulates a number of modules including memory consolidation, spatial navigation, temporal processing and emotion. A banana-shaped structure, the hippocampus is constituted of morphologically distinct subregions including the dentate gyrus, CA3 and CA1 (here, we do not distinguish the “hippocampus proper” which consists only of CA1, CA3 and smaller CA2 and CA4 areas, from the “hippocampal formation,” composed of these in addition to the dentate gyrus and subiculum). Distinct cell types give rise to unique axonal fiber pathways in the dentate gyrus, CA3 and CA1 subregions; accordingly, these areas may exhibit differential molecular profiles in response to a number of behavioral paradigms and pharmacological and genetic treatments. It is therefore in the interest of the investigator to dissect a specific subregion from the whole hippocampus. Here we outline a protocol for subregion-specific dissection from the adult mouse.
Materials and Reagents
- Microspatula (Thermo Fisher Scientific, catalog number: 21-401-10 )
- Short microspatula (Thermo Fisher Scientific, catalog number: 21-401-15 )
- Filter paper (11 cm) (Thermo Fisher Scientific, catalog number: 09-795D )
- WypAll or KimWipes
- Ice buckets
- Cloth diapers
- Dry Ice
- Biohazard waste bags
- Adult laboratory mice
- 10x Stock Cutting Solution (see Recipes)
- 1 M KCl (see Recipes)
- 1 M MgCl2 (see Recipes)
- 1 M CaCl2 (see Recipes)
- 1x Cutting Solution (make from 10x stock) (see Recipes)
Equipment
- Surgical Scissors (Fine Science Tools, catalog number: 14130-17 )
- Fine Scissors (Fine Science Tools, catalog number: 14094-11 )
- Forceps (Fine Science Tools, catalog number: 11506-12 )
- Scalpel handle (Fine Science Tools, catalog number: 10003-12 )
- Scalpel blades #15 (Fine Science Tools, catalog number: 10015-00 )
- Single edge razor blades
- Petri dishes (100 mm x 15 mm) (Sigma-Aldrich, catalog number: CLS3160101 )
- Transfer pipettes (Thermo Fisher Scientific, catalog number: 13-711-7M )
- 20 ml beaker (Thermo Fisher Scientific, catalog number: 02-539-1 )
- 600 ml beaker (Sigma-Aldrich, catalog number: CLS1000600 )
- 1 L bottle (Sigma-Aldrich, catalog number: CLS13951L )
- Nuclease-free microtubes (1.5-1.7 ml)
- Plastic spoon
- Microscope
- Pressurized oxygen tank (95% O2/5% CO2) with tubing
Procedure
- Place container of 1x Cutting Solution in a filled ice bucket, and transfer ~15 ml of the solution into a 20 ml beaker also on wet ice.
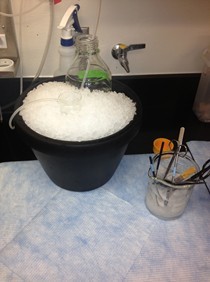
- Oxygenate the solutions in both the bottle and beaker for at least 20 min before beginning (see below).
- Surround bench with cloth diapers, and secure a biohazard waste bag near the work bench.
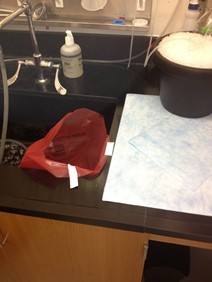

- Place all dissection tools except razor blades and scalpel into a 600 ml beaker containing sterile water and WypAll or KimWipe cloths submerged in the water. Place the tools facing down on the cloths so as to minimize direct contact with the glass beaker.
- Place labeled microtubes in a bucket containing dry ice (blue bucket above). Likewise, place one piece of a petri dish on the dry ice and let cool.
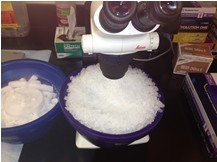
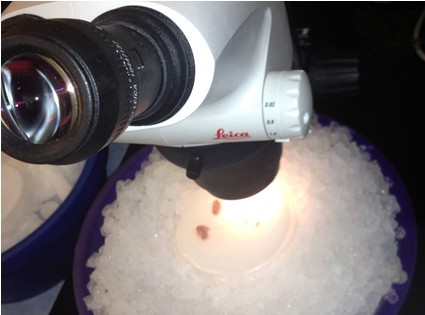
- Place small ice bucket containing ice under microscope (purple bucket above).
- Fill one ice bucket with ice and secure the other piece of the petri dish on the ice so that the edges are facing down. Place one piece of filter paper on the dish.
- Immediately before beginning, transfer enough cutting solution from the 20 ml beaker to the filter paper and spread evenly.
- Place a new cloth diaper over the bench before each dissection. Place the mouse on the diaper, maintaining a grip over the tail with the right hand (for right-handed individuals).
- Rapidly secure the mouse with the left hand such that the scruff posterior to the rodent’s head is firmly held between the left thumb and proximal forefinger. The mouse should be firmly in the experimenter’s control at this point. Transfer the base of the tail from the right hand to the left hand so that it is secured between the distal ring and little fingers.
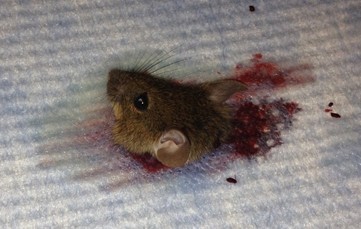
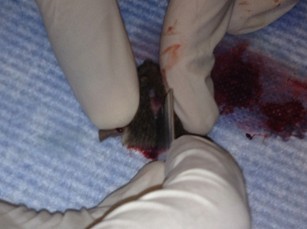
- Place smooth end of large scissors just behind the skull and hold down firmly with the right hand. Rapidly pull on the tail with the left hand until the rodent skull is dislocated from the spinal cord.
- After cervical dislocation, decapitate with the same scissors, being sure to cut just behind the skull. If the cut is too far posterior, excess tissue will occlude the foramen magnum.
- While gently pulling the scalp to lateral sides, cut scalp skin from between the rodent’s eyes down the midline using a razor blade.
- Place one tip of the fine scissors into the foramen magnum and cut laterally into the skull. Repeat for the other side. Gently cut from the same cavity up the midline towards the nose, trying to keep the end of the scissors as superficial as possible so as not to perturb the brain.
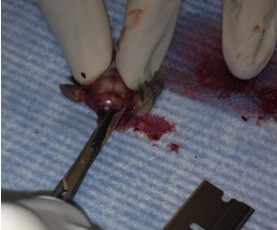
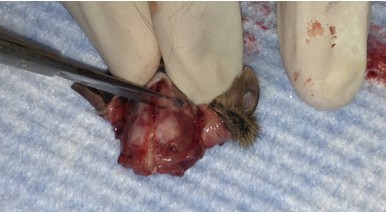
- Make small cuts from the midline incision near the eyes laterally.
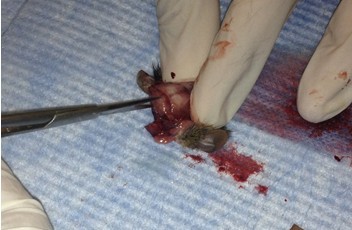
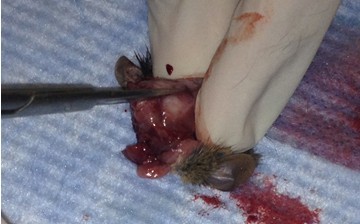
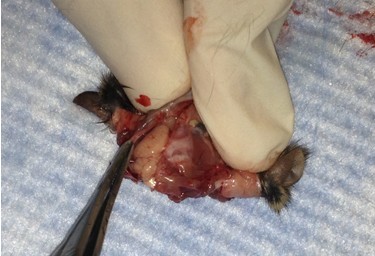
- Use forceps to apply gentle tangential, lateral pressure to either of the newly formed skull flaps. Repeat for the remaining side. If force is properly applied, the skull should be fully removed and the brain exposed. If a piece of skull breaks off before the respective hemisphere is exposed, discard it and use forceps again to coerce the remaining flap to the side. In this case, be sure to minimize contact between the forceps tips and brain tissue.

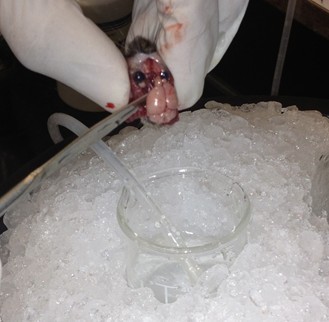
- Use longer microspatula to gently transfer the brain to the 20 ml beaker of oxygenated cutting solution. This involves tearing cranial nerve fibers near the base of the brain.
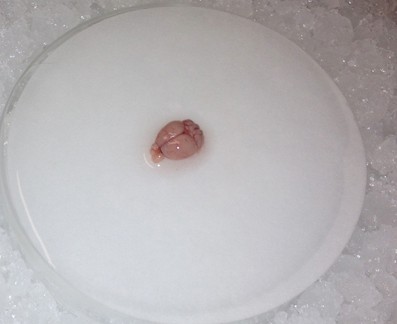
- Use the spoon to transfer the brain to the wetted filter paper, and hemisect the brain using a clean razor blade. Transfer either hemisphere back to the 20 ml beaker.
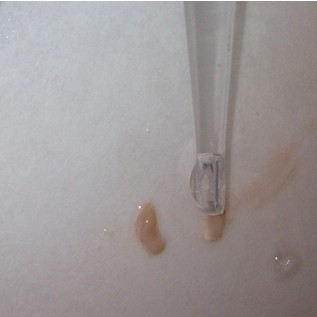
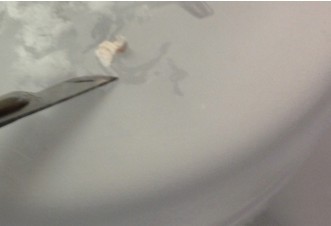
- Using the two short microspatulas, remove the hippocampus: Anchor one spatula tip just over the cerebellum near the junction with the cortex. Place the other spatula tip near the same junction and peel the cortical hemisphere laterally in a gentle manner. Periodically use the transfer pipette to apply fresh cutting solution to the tissue.
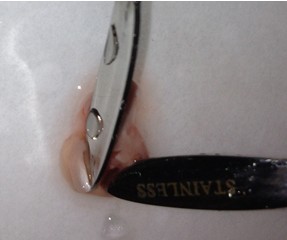
- Once the cortical hemisphere is fully peeled laterally, the hippocampus should be exposed. While anchoring the brain with one spatula tip, place the other just under the caudal tip of the hippocampus. Carefully apply pressure to the medial white matter tracts with the anchoring spatula while moving the second spatula tip slightly anteriorly and laterally. “Scoop” or “roll” the hippocampus laterally with that spatula tip. If done properly, the hippocampus should land on the filter paper with “glossy” end up. Repeat for the second hemisphere.
- Once both hippocampi are removed and placed on the filter paper, transfer it along with the petri dish piece to the ice bucket underneath the microscope. Align each hippocampus so that the anterior end (slightly thinner than the posterior end – this is more easily seen by observing the hippocampus from the side rather than the top) is facing upward.
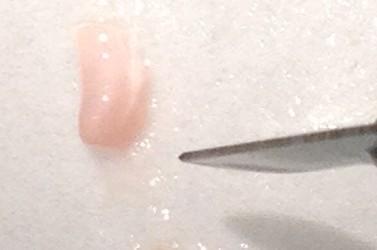
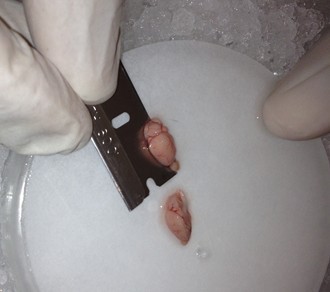
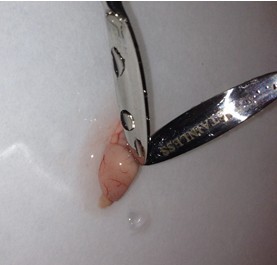
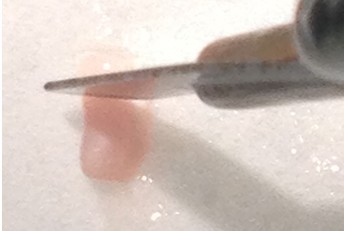
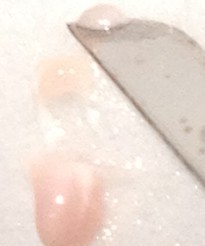
- Use the scalpel to make small vertical incisions in both the anterior and posterior tips of the hippocampus. This will create flat, blunt tips.
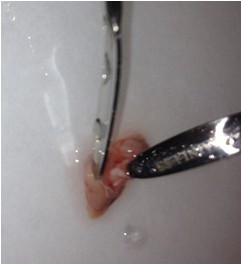
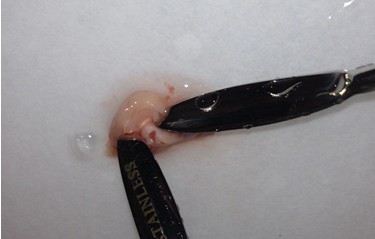
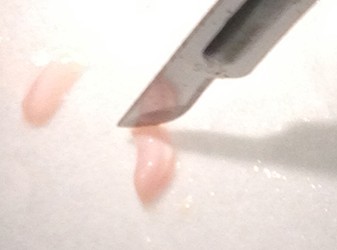
- Make a similar incision about 1/3rd or 1/4th of the way from the anterior to posterior end while observing through the microscope. Carefully “stand” the small segment of the tissue above the blade on the face created earlier (right figure below – CA1 is on top). Be sure to apply fresh cutting solution but only in small quantities – excess solution will blur the distinctions of the hippocampal subregions.
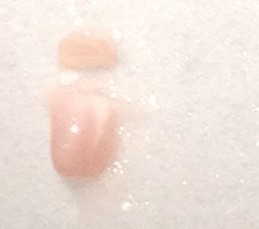
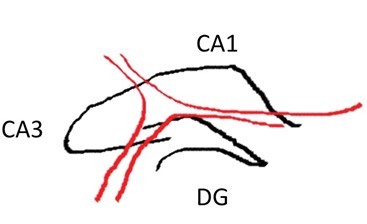
- Using the scalpel, dissect out area CA1, CA3 or dentate gyrus (DG) with one curved cut downwards through the tissue (see diagram below for approximate dissection guidelines for a right hippocampus cross-section). Immediately transfer the dissected tissue with the scalpel to the petri dish piece on dry ice. The tissue should freeze very rapidly.
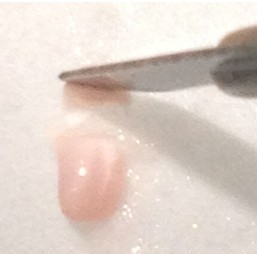
- Repeat step 23 with the remaining piece of tissue, keeping in mind that CA1 ends approximately 2/3rds of the way from the anterior to posterior end. Depending on the thickness of pieces cut, a total of 2-4 segments will have been created. Work quickly and minimize overall disruption of brain tissue.
- Once all pieces of tissue are frozen on dry ice, use the scalpel blade to detach the tissue from the petri dish and place in a labeled microtube. It is often convenient to “stack” tissue on the petri dish as it is collected. This way, one larger piece will be created, and it can be dislodged more easily than multiple small pieces of frozen tissue.
- Store microtubes at -80 °C until tissue is ready for processing.
Recipes
- 10x Stock Cutting Solution
For 1 L stock, mix the following in a graduated cylinder and bring up to 1 L with sterile Milli-Q water:
73.00 g NaCl
1.72 g Sodium phosphate (monobasic, monohydrate)
21.00 g Sodium bicarbonate
18.10 g D-Glucose
Sterile filter with vacuum filtration, and stored at 4 °C
- 1 M KCl
Dissolve 14.91 g KCl in Milli-Q water and bring up to a volume of 200 ml
Sterile filter and stored at 4 °C
- 1 M MgCl2
Dissolve 40.66 g MgCl2 hexahydrate in Milli-Q water and bring up to a volume of 200 ml
Sterile filter and stored at 4 °C
- 1 M CaCl2
Dissolve 29.40 g CaCl2 dihydrate in Milli-Q water and bring up to a volume of 200 ml
Sterile filter and stored at 4 °C
- 1x Cutting Solution
For 1 L solution:
Mix 100 ml 10x stock solution
120 mg sodium L-ascorbate
3 ml 1 M KCl stock, bring up to 900 ml with Milli-Q water
Begin oxygenation with 95% O2/5% CO2 for at least 20 minutes
Add 7 ml MgCl2 and 0.5 ml CaCl2 and continue oxygenation
Confirm that pH is in physiological range ~7.2-7.4
Bring up to a final volume of 1 L with Milli-Q water
(Optional) Confirm that osmolarity is ~315-325 mOsm
Sterile filter, keep container on ice and bring to experiment setup
Acknowledgments
This protocol was adapted from a previously published paper: Levenson et al. (2006). This work was supported by the NIH (MH095270, MH57014, AG031722, NS057098, P30 NS47466), the Ellison Medical Foundation, and the McKnight Brain Research Foundation.
References
- Levenson, J. M., Roth, T. L., Lubin, F. D., Miller, C. A., Huang, I. C., Desai, P., Malone, L. M. and Sweatt, J. D. (2006). Evidence that DNA (cytosine-5) methyltransferase regulates synaptic plasticity in the hippocampus. J Biol Chem 281(23): 15763-15773.
- Miller, C. A. and Sweatt, J. D. (2007). Covalent modification of DNA regulates memory formation. Neuron 53(6): 857-869.
- Sultan, F. A., Wang, J., Tront, J., Liebermann, D. A. and Sweatt, J. D. (2012). Genetic deletion of Gadd45b, a regulator of active DNA demethylation, enhances long-term memory and synaptic plasticity. J Neurosci 32(48): 17059-17066.
- Sweatt, J. D. (2009). Mechanisms of Memory. Academic Press.
Article Information
Copyright
© 2013 The Authors; exclusive licensee Bio-protocol LLC.
How to cite
Readers should cite both the Bio-protocol article and the original research article where this protocol was used:
- Sultan, F. A. (2013). Dissection of Different Areas from Mouse Hippocampus. Bio-protocol 3(21): e955. DOI: 10.21769/BioProtoc.955.
-
Sultan, F. A., Wang, J., Tront, J., Liebermann, D. A. and Sweatt, J. D. (2012). Genetic deletion of Gadd45b, a regulator of active DNA demethylation, enhances long-term memory and synaptic plasticity. J Neurosci 32(48): 17059-17066.
Category
Neuroscience > Behavioral neuroscience > Cognition
Cell Biology > Tissue analysis > Tissue isolation
Do you have any questions about this protocol?
Post your question to gather feedback from the community. We will also invite the authors of this article to respond.